There are two great reasons why it makes a lot of sense to use Twyla to program your microcontroller device:
Twyla lets you quickly combine Choreos to build arbitrarily complex behaviors that can be triggered from a microcontroller board whenever you like (e.g., when a sensor value passes a specific threshold). Offloading the processing to Temboo means that you don't have to compromise on your app's functionality, and it leaves you with plenty of free RAM on your board for working with sensor data. After following the steps in this particular example, you'll be able to extend and apply the principles explained here to your own hardware programming project.
This tutorial shows you how to build a Choreo that takes a single sensor value as input and uses it to update a Google Spreadsheet and send an email via Gmail. This is really handy behavior when you want logging and alerting functionality in the same application.
1Make sure you have a Temboo account. If you don't already have one, you can register for a free account here.
2Download and install Twyla for Mac or Windows. For information about how to obtain the Twyla installer, please contact support@temboo.com
3Launch Twyla, and log in using your Temboo account name, email and password. If you need a reminder of these details, you can find them on your Account Info page.
4Since this Choreo example updates a Google Spreadsheets, you'll want to follow the instructions here to obtain your ClientID, ClientSecret, and RefreshToken for accessing the Google Spreadsheets API.
5To send an email using Gmail, you'll want to enable 2-Step Verification and create an App Password. You can find instructions for this here.
6First , make sure you're in an empty "New Choreo" document.
7Now, let's start by creating a variable to store our sensor value. Go to the Variables Pane, and create a New Local Variable. Give the variable the name "SensorValue", assign the type as String, and enable the check box to define this variable as an input.
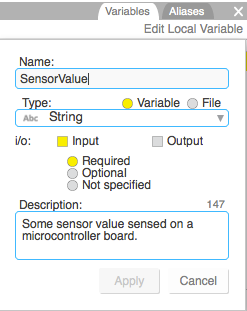
The SensorValue variable in Twyla
8Next, drag a Launch Choreo Step from the Steps Palette to the canvas and double-click to edit it. This will be the Choreo that saves the SensorValue input to a Google Spreadsheet.
9Use the Library tree on the left to navigate to the Google > Spreadsheets bundle. Drag the AppendRow Choreo into the "Choreography" parameter of the Launch Choreo Step. Fill out all the other required inputs too (they are highlighted in pink). For the "RowData" input, drag in the SensorValue input variable that you created earlier. This means that we're writing the value of this input to the spreadsheet. Click OK to save your changes and go back to the canvas.
Note: The spreadsheet you're writing to must have at least one named column, like this one.
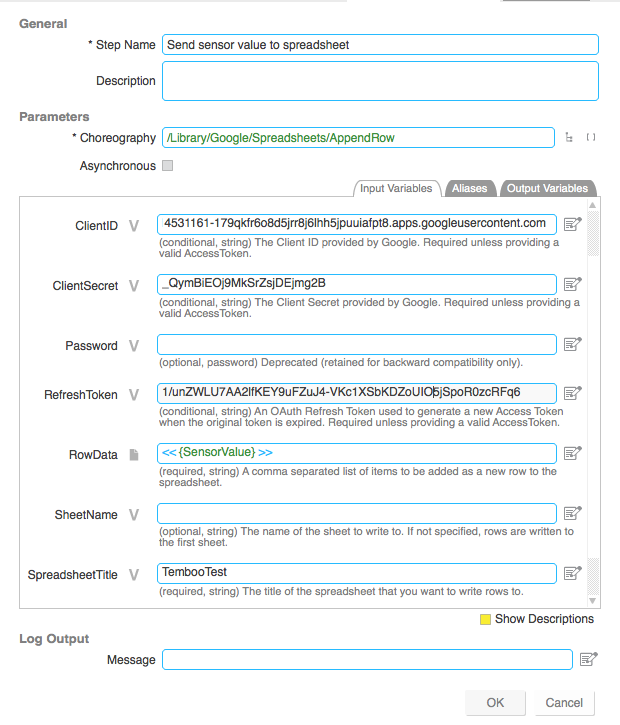
Setting up the inputs for the Google Spreadsheets AppendRow Choreo
10Now, let's get another Launch Choreo Step from the Palette. This one will be used to send the sensor value in an email once the value has been written to the spreadsheet.
11Draw a "Next" connection from the first Launch Choreo step to this new one.
12Open up your new step and drag the Google > Gmail > SendEmail Choreo into the "Choreography" parameter. Fill in the rest of the required inputs, dragging in the SensorValue variable into the MessageBody input as shown in the screenshot below. Make sure to use your full email address e.g., martha.temboo@gmail.com for the "Username" parameter and an App-specific password.
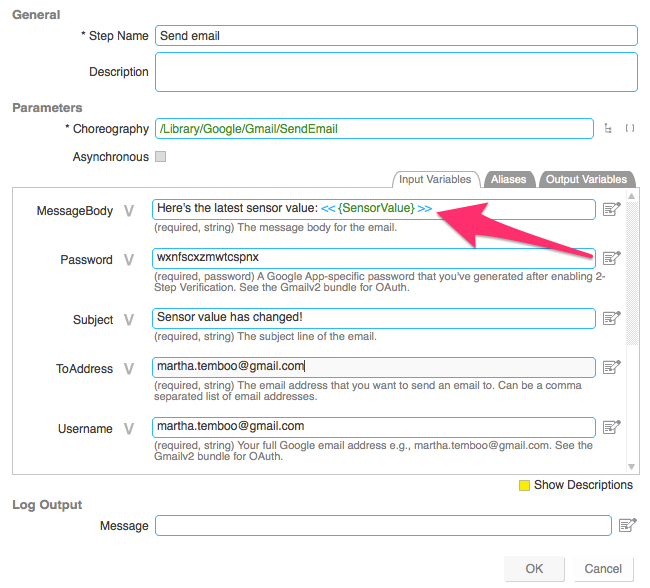
Setting up the inputs for the Gmail SendEmail Choreo
13Click OK to save your changes and return to the canvas. At this point, your Choreo should look something like this:

Update a spreadsheet and send an email when a sensor value changes
14That's all the editing done, so you can save the Choreo now. Click 'Save' and select the Choreos folder as the location to save your new Choreo.
15Now we're ready to test out the new Choreo. Click "test" in Twyla's mode selector to switch to the test pane.
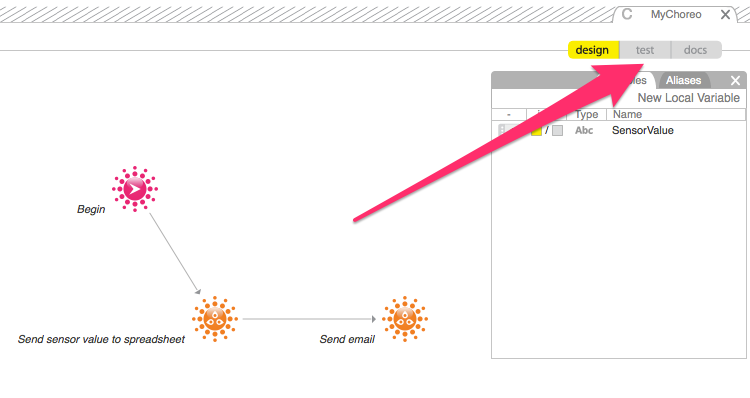
Twyla's mode selector set to Test mode (you can find this above the variables pane)
16Enter some sensor value to test with and hit Start. Once the Choreo completes, your spreadsheet should have updated and you should also have received an email (assuming you set up the SendEmail Choreo to send to yourself).
We provide a number of ways to call Choreos from your code when you're ready to put them to work. You can learn about your various options in this tutorial.
That's it, you're all done. Now you know how to create arbitrarily complex Choreos that you can call with just a few lines of code from your microcontroller device. By programming hardware in this fashion you can leave the physical constraints of your board behind and open up an endless world of possibilities. And reprogramming your device is as simple as editing the Choreo in Twyla–you don't have to update the code on the hardware. Why not check out the 2000+ Choreos in our Library and start planning your next project.
We're always happy to help. Just email us at support@temboo.com, and we'll answer your questions.